• 设为首页
  • 点击收藏
  • 手机版
    手机扫一扫访问
    迪恩网络手机版
  • 关注官方公众号
    微信扫一扫关注
    迪恩网络公众号

maxmacstn/MQTT-AC-Controller: Wi-Fi enabled AC Controller that works with HomeBr ...

原作者: [db:作者] 来自: 网络 收藏 邀请

开源软件名称:

maxmacstn/MQTT-AC-Controller

开源软件地址:

https://github.com/maxmacstn/MQTT-AC-Controller

开源编程语言:

C++ 89.4%

开源软件介绍:

ESP8266 Wifi AC Controller

header

Code for ESP8266 Microcontrollers that control my DIY Air-Conditioner remote. Code in this repo is intentionaly to use with Homebridge MQTT plugin on raspberry Pi. 
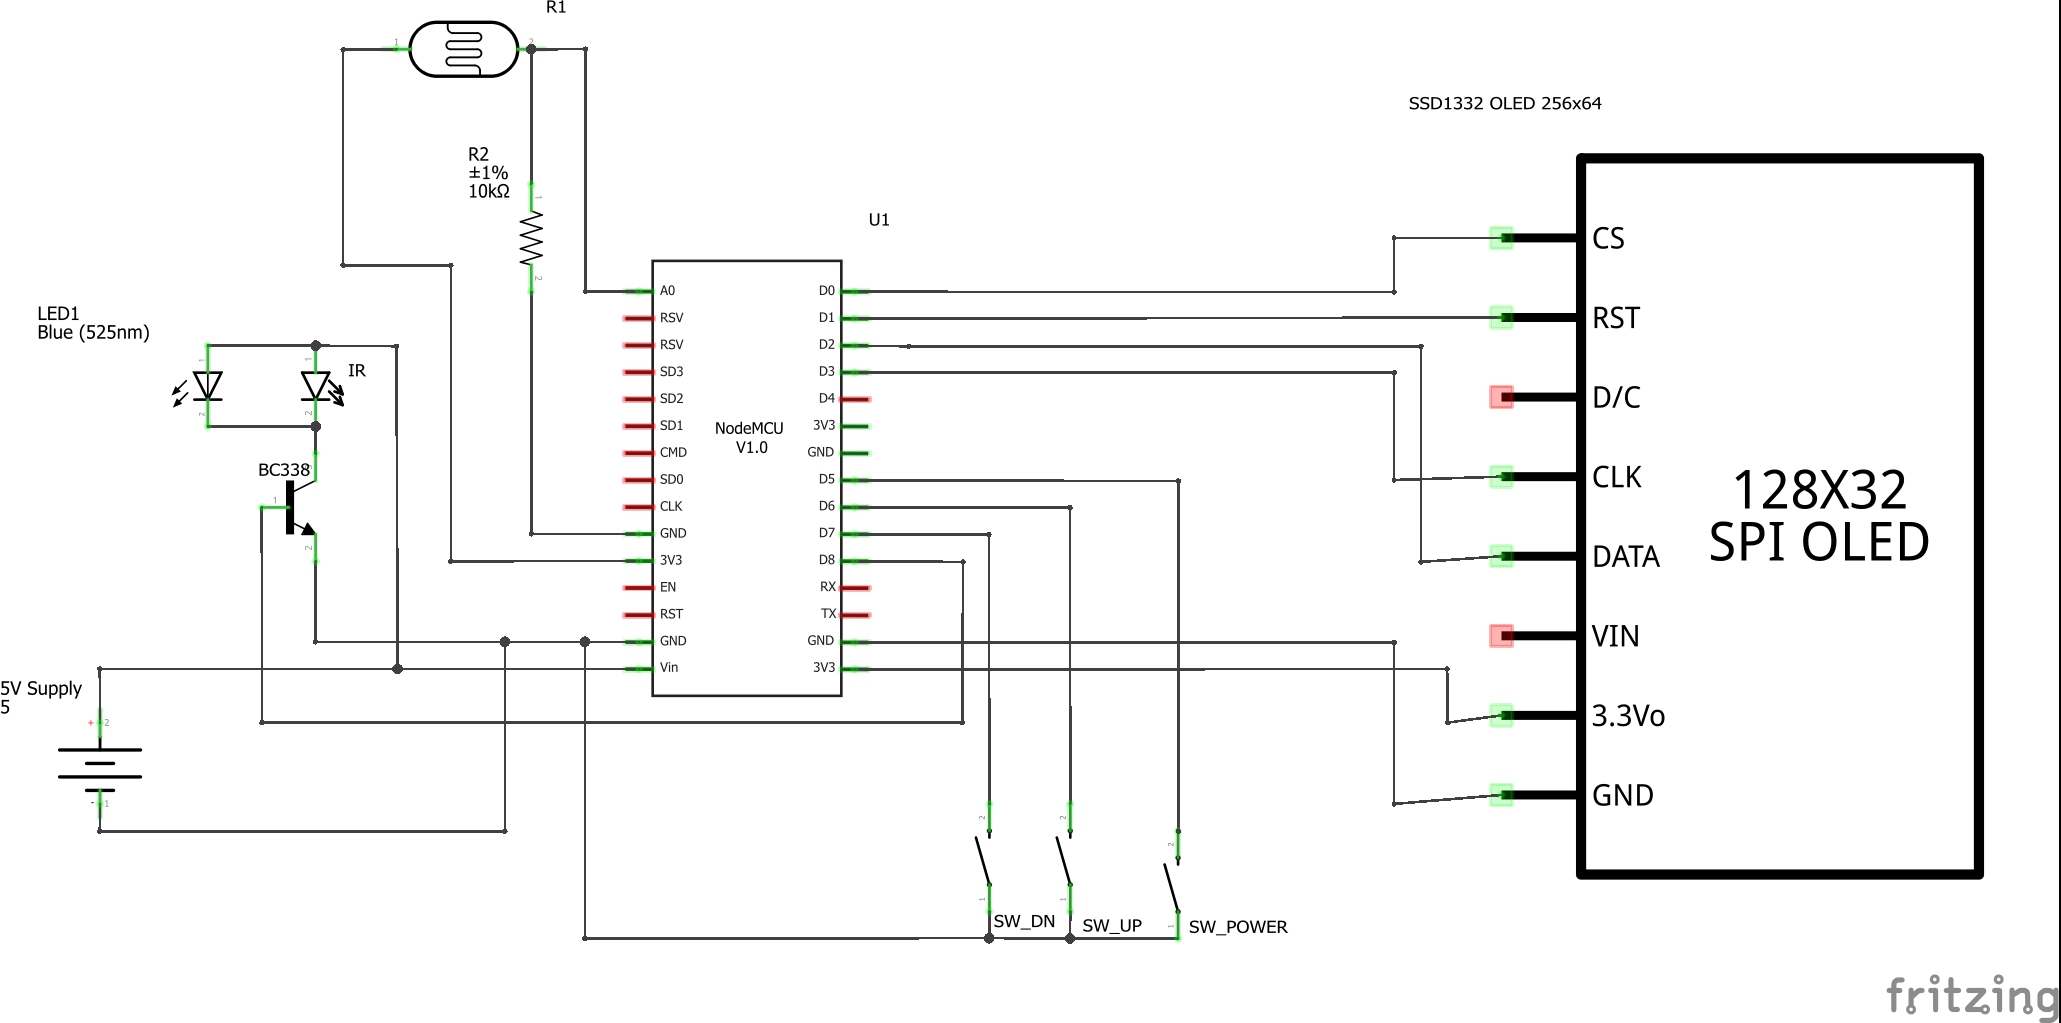
I made a circuit and enclosure by myself. I know that my circuit might need to add some resistors, feel free to edit it in your design.

Features

  • Display NTP Clock when standby.
  • Simple button control. Power, Temp up/down.
  • Can control temperature, swing, fan speed and mode with HomeKit.
  • Auto brightness according to ambient light.
  • OTA Firmware upgrade.
  • Control via HomeKit using HeaterCooler Service (iOS 11+)
  • Control via HomeKit(Below iOS 11), Amazon Alexa using Fan service because it does not support AC control.

Hardware

  • ESP8266 NodeMCU
  • OLED 256×64 SSD1332
  • LDR(Light Dependent Resistor)
  • Push Button
  • IR LED and LED (normal led for indicate when IR is emitting)
  • NPN Transistor BC338 - for increse voltage level for IR LED

schematic

Add this devices to Homebridge-MQTT

You can use program like MQTTLENS to send this command

Topic

homebridge/to/add

Payload

{
  "name": "Smart AC",
  "service_name": "smart_ac",
  "service": "HeaterCooler",
  "manufacturer": "ESP8266",
  "firmwarerevision": "1.0.0",
  "SwingMode": 1,
  "RotationSpeed": {"maxValue":3, "minValue": 0, "minStep": 3},
 "CoolingThresholdTemperature": {"maxValue":28, "minValue": 18, "minStep": 1}
}

Instruction

  1. I didn't made this project to supports all AC. It requires some modification to works with your AC. Please take a look at IRremoteESP8266 library which supports variety of AC brand.
  2. I developed this program with VSCode with PlatformIO plugin. Please install all missing libraries with PlaformIO
  3. Don't forget to change MQTT server ip address to match yours.
  4. For the first time, use Wifi setup to connect to your router.

Dependencies

  • PubSubClient
  • IRremoteESP8266
  • U8g2
  • WifiManager
  • ArduinoJson

Known issues

  • Schematics can be improved.
  • Interrupt can cause system crash.


鲜花

握手

雷人

路过

鸡蛋
该文章已有0人参与评论

请发表评论

全部评论

专题导读
热门推荐
阅读排行榜

扫描微信二维码

查看手机版网站

随时了解更新最新资讯

139-2527-9053

在线客服(服务时间 9:00~18:00)

在线QQ客服
地址:深圳市南山区西丽大学城创智工业园
电邮:jeky_zhao#qq.com
移动电话:139-2527-9053

Powered by 互联科技 X3.4© 2001-2213 极客世界.|Sitemap