Homebridge Enphase Envoy v4.5.0 and above the minimum required version of Homebridge is 1.3.x.
If count of all installed devices is grater than 100, the app will stop responding. This is HomeKit limitations, if this happens by You please open the issue, I will look how to fix this.
Know issues
If used with Hoobs, there is a possible configuration incompatibilty.
Envoy with firmware 7.x.x will not work due to new authentications method.
More info and discusion about authentication method changed and loss of local API connectivity here
Troubleshooting
If for some reason the device is not displayed in HomeKit app try this procedure:
Go to ./homebridge/persist.
Remove AccessoryInfo.xxx file which contain Your device data: {"displayName":"Envoy"}.
Next remove IdentifierCashe.xxx file with same name as AccessoryInfo.xxx.
Restart Homebridge and try add it to the Home app again.
About the plugin!
All devices are detected automatically (Envoy, Q-Relays, AC Batteries, Meters, Microinverters, Ensemble, Encharges, Enpower, WirelessKit).
Envoy device ID is detected automatically, is required to control Power Production.
Envoy password is detected automatically or can be added in config if was already chenged by user.
Installer password is required to read communications level of (Microinverters, Q-Relays, AC Batteries) and data from Ensemble devices (Enpower, Encharges).
For best experiences please use Controller App or EVE app for iOS, Home app display it as unsupported.
Home automations and shortcuts can be used to check Devices communication level and change Power Production Mode.
MQTT Client publisch all available data from all installed devices.
Meters Reading Data is refresh every 1.5 sec.
Production CT Data is refresh every 3.0 sec.
Important changes
v5.5.0 and above!
Added MQTT Client.
v5.2.15 and above!
Added system Power Production - Enable/Disable (required installerPasswd).
Finally detects Ensemble, Encharges and Enpower (required installerPasswd).
v4.x.x and above!
Version 4.0.0 whole new concept.
All devices in are detected automatically (Envoy, Q-Relays, AC Batteries, Meters, Microinverters).
v3.x.x and above!
From v3.0.0 the plugin is present as Power Meter and the Power is displayed in (kW) and Energy in (kWh).
For best experiences please use Controller App or EVE app for iOS, Home app display it as unsupported.
v2.3.x
The plugin is present as C02(ppm) sensors and the Power is displayed in Watt and Energy in Wh/kWh.
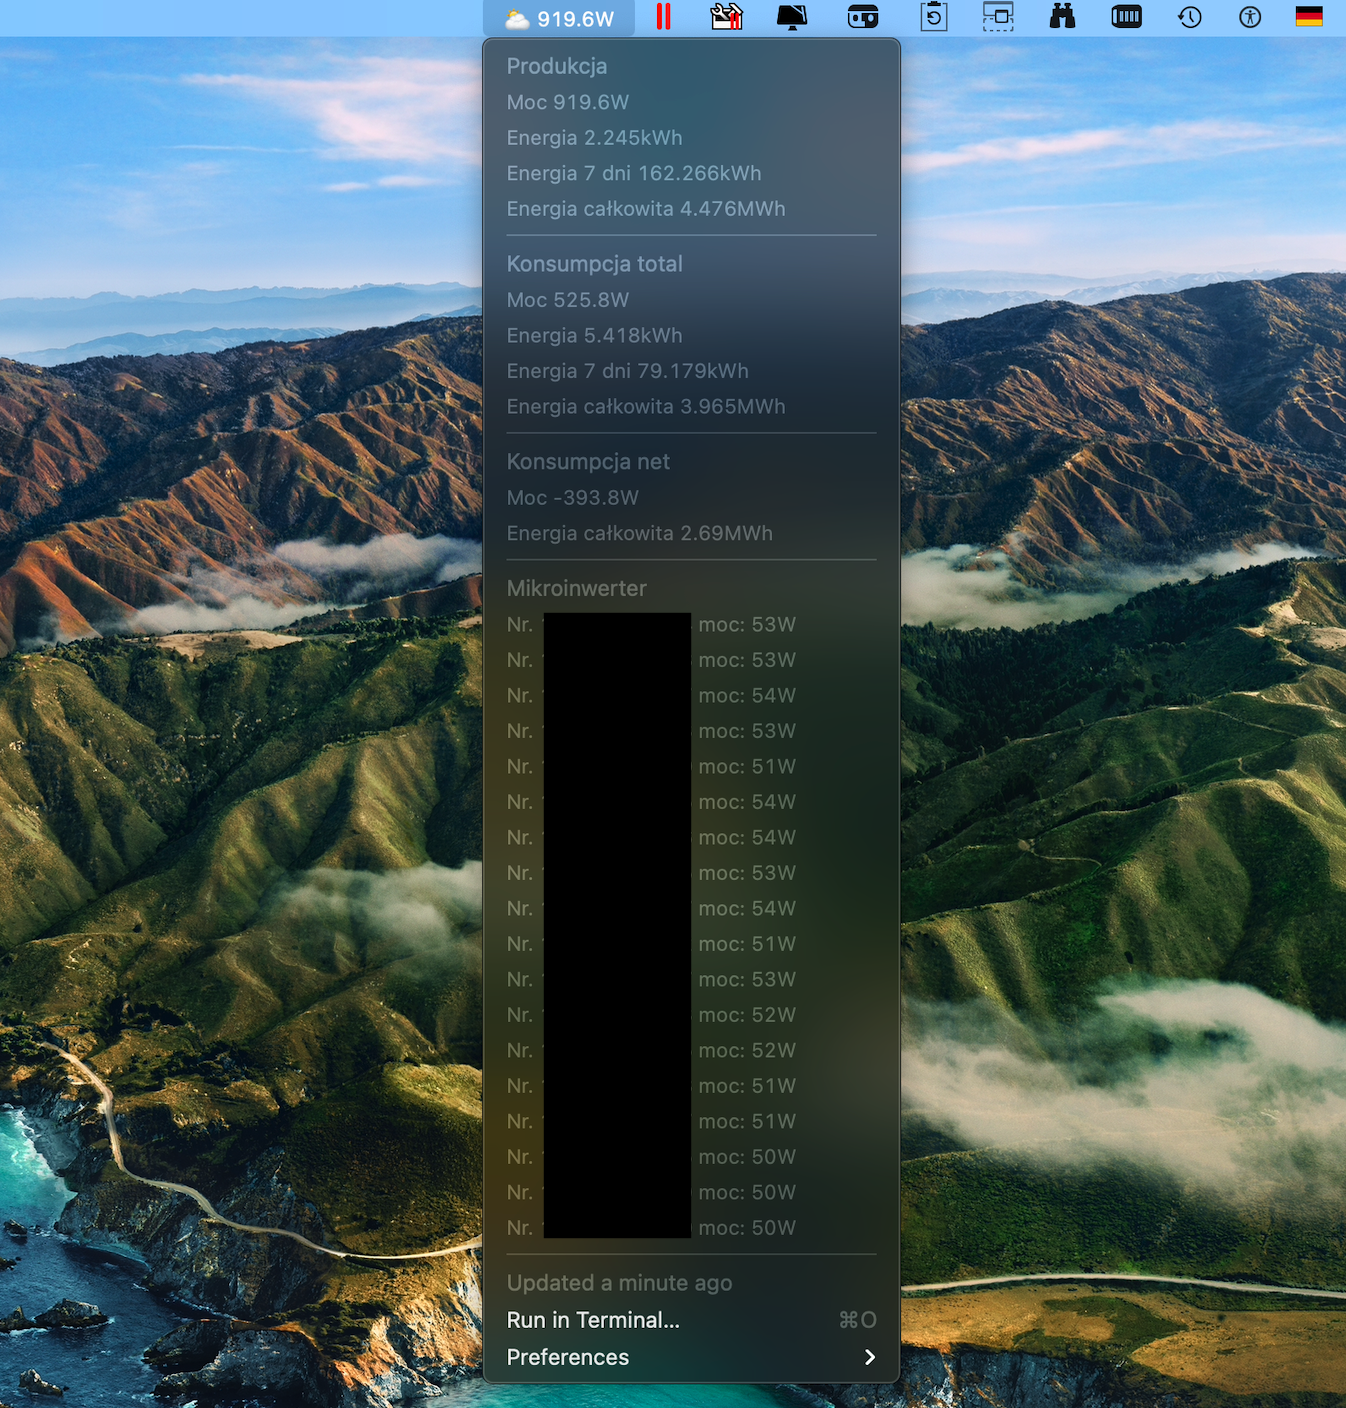
Production Current Level (W) - is the current Power production in (W). If the value is (< 0) and display (-values) then the PV consumed power from Grid.
Consumption Current Level Total (W) - is the Total Power Consumption in (W)).
Consumption Current Level Net (W) - is the Power Consumption from Grid in (W). If the value is (< 0) and display (-values) then the Power is exported to the Grid.
Peak Level (W) - display the maximum Power production/consumption.
Production Current Level (Wh)/(kWh) - is the Energy production (Lifetime and 7Days in kWh, Today in Wh).
Consumption Current Level (Wh)/(kWh) - is the Total and Net Energy Consumption (Lifetime and 7Days in kWh, Today in Wh).
Power Production Control
You can set task for the Envoy to Enable/Disable power production on the microinverters (required installerPasswd).
On a typical system during daylight hours, the Envoy will execute the task within 15 minutes.
Install and use Homebridge Config UI X plugin to configure this plugin (Highly Recommended). The sample configuration can be edited and used manually as an alternative. See the sample-config.json file in this repository for an example or copy the example below into your config.json file, making the apporpriate changes before saving it. Be sure to always make a backup copy of your config.json file before making any changes to it.
Key
Description
name
Here set the accessory Name to be displayed in Homebridge/HomeKit.
host
Here set the IP Address or Hostname or leave empy (will be used default path envoy.local)
enableDebugMode
If enabled, deep log will be present in homebridge console.
disableLogInfo
If enabled, then disable log info, all values and state will not be displayed in Homebridge log console
envoyUser
Here set the envoy user or leave empty, standard is envoy (removed from 4.6.11, not nedded anymore)
envoyPasswd
Here set the envoy password (only if U already changed the default password)
installerUser
Here set the optional installer user, standard is installer (removed from 4.6.11, not nedded anymore)
check ON if AC Batteries are installed. (not available from v3.5.0)
acBatteriesStorageOffset
Here set the Offset of AC Batteries energy if nedded in (Wh),(+/-) (not available from v4.9.0)
powerConsumptionMetersInstalled
Here check ON if consumption meters are installed. (not available from v3.5.0)
powerProductionMeter
Here select which meter will be used to display Power production. (not available from v3.5.0)
powerProductionMaxDetected
Here set the maximum production Power, if the Power production will be >= powerProductionMaxDetected then You get notification message from the HomeKit
energyProductionLifetimeOffset
Here set the Offset of lifetime energy production if nedded in (Wh),(+/-)
powerConsumptionMeter
Here select which meter will be used to display Power consumption. (not available from v3.5.0)
powerConsumptionTotalMaxDetected
Here set the maximum total consumption Power, if the total Power consumption will be >= powerConsumptionTotalMaxDetected then You get notyfication message from the HomeKit
energyConsumptionTotalLifetimeOffset
Here set the offset of lifetime total energy consumption if nedded in (Wh),(+/-)
powerConsumptionNetMaxDetected
Here set the maximum Power consumption from Grid, if the Power consumption will be >= powerConsumptionNetMaxDetected then You get notyfication message from the HomeKit
energyConsumptionNetLifetimeOffset
Here set the offset of lifetime net energy consumption if nedded in (Wh),(+/-)
enableMqtt
If enabled, MQTT Broker will start automatically and publish all awailable PV installation data.
mqttHost
Here set the IP Address or Hostname for MQTT Broker.)
mqttPort
Here set the Port for MQTT Broker, default 1883.)
mqttPrefix
Here set the Prefix for Topic or leave empty.)
mqttAuth
If enabled, MQTT Broker will use authorization credentials.
mqttUser
Here set the MQTT Broker user.
mqttPasswd
Here set the MQTT Broker password.
mqttDebug
If enabled, deep log will be present in homebridge console for MQTT.
manufacturer, modelName
Optional free-form informational data that will be displayed in the Home.app if it is filled in (not available from v4.7.0)
{
"platform": "enphaseEnvoy",
"devices": [
{
"name": "Envoy",
"host": "192.168.1.35",
"refreshInterval": 30,
"enableDebugMode": false,
"disableLogInfo": false,
"envoyUser": "envoy", //removed from 4.6.11, not nedded anymore"envoyPasswd": "",
"installerUser": "installer", //removed from 4.6.11 not nedded anymore"installerPasswd": "",
"acBatteriesStorageOffset": 0, //removed from 4.9.0 not nedded anymore"powerProductionMaxDetected": 5400,
"energyProductionLifetimeOffset": 0,
"powerConsumptionTotalMaxDetected": 10000,
"energyConsumptionTotalLifetimeOffset": 0,
"powerConsumptionNetMaxDetected": 10000,
"energyConsumptionNetLifetimeOffset": 0,
"enableMqtt": false,
"mqttHost": "192.168.1.33",
"mqttPort": 1883,
"mqttPrefix": "home/envoy",
"mqttAuth": false,
"mqttUser": "user",
"mqttPass": "password",
"mqttDebug": false,
"manufacturer": "Manufacturer", //removed from 4.7.0 not nedded anymore"modelName": "Model"//removed from 4.7.0 not nedded anymore
}
]
}
Adding to HomeKit
Each accessory needs to be manually paired.
Open the Home app on your device.
Tap the Home tab, then tap .
Tap Add Accessory, and select I Don't Have a Code or Cannot Scan.
Select Your accessory.
Enter the Homebridge PIN, this can be found under the QR code in Homebridge UI or your Homebridge logs, alternatively you can select Use Camera and scan the QR code again.
Limitations
That maximum Services for 1 accessory is 100. If Services > 100, accessory stop responding.

 客服电话
客服电话
 APP下载
APP下载

 官方微信
官方微信


请发表评论