In this class, you will stipulate how you will fetch new data, continue to fetch data on scroll and how to handle errors from each interaction
class ReposDataSource(var user : String) : BaseDataSource<Repos>() {
    val manager : ReposManager = ReposManager()

    @SuppressLint("CheckResult")
    override fun loadInitialData(params: LoadInitialParams<Int>, callback: LoadInitialCallback<Int, Repos>) {
        // in the initial load, we will start at page 0, and retrieve the number of pages in the params.requestLoadSize
        manager.getListOfRepos(user, 0, params.requestedLoadSize)
                .subscribeOn(Schedulers.io())
                .observeOn(AndroidSchedulers.mainThread())
                .subscribe(
                        { items -> submitInitialData(items, params, callback) },
                        { error -> submitInitialError(error) }
                )
    }

    @SuppressLint("CheckResult")
    override fun loadAditionalData(params: LoadParams<Int>, callback: LoadCallback<Int, Repos>) {
        manager.getListOfRepos(user, params.key, params.requestedLoadSize)
                .subscribeOn(Schedulers.io())
                .observeOn(AndroidSchedulers.mainThread())
                .subscribe(
                        { items -> submitData(items, params, callback) },
                        { error -> submitError(error) }
                )
    }
}
Step 3 - Create a Factory for the DataSource
We then need to tell Android how to create the specified Data Source, to do that we create a new class on the utils.pagination.factory package.
class ReposDataSourceFactory(var loading: OnDataSourceLoading,
                             var user: String?) : DataSource.Factory<Int, Repos>() {
    lateinit var source : ReposDataSource

    override fun create(): DataSource<Int, Repos>? {
        // invalidate the previous data source, if available
        if (::source.isInitialized && source != null) source.invalidate()
        // if we have a user, then create a data source
        if (user != null) {
            source = ReposDataSource(user!!)
            source.onDataSourceLoading = loading
            return source
        }
        return null
    }
}
Step 4 - Create a new Adapter
By extending the BaseDiffAdapter class and creating a custom ViewHolder object we can pass data to our items.
Please note that in the onCreateViewHolder method, we will need to take into account that when the View is of type VIEW_TYPE_LOADING, we will need to inflate the correct view.
Your ViewModel must extend BasePaginationViewModel in order to register the DataSource actions.
Then, you will need to create a new DataSourceFactory object in the class initialization block and specify the number of pages needed.
class MainViewModel : BasePaginationViewModel<ReposDataSourceFactory, Repos>() {
    init {
        dataSourceFactory = ReposDataSourceFactory(getListener(), null)
    }

    override fun getPageSize(): Int {
        return 3
    }
}
Step 7 - Register the observables in your Activity Class
After setting up the RecyclerView adapter and LayoutManager, you will need to register BasePaginationViewModel's 4 LiveData observables in order to get the actions from the data source.
// Toast for API Errors
viewModel.errorToastEvent.observe(this,
Observer { Toast.makeText(this, getString(R.string.err_search), Toast.LENGTH_LONG) }
)
// Clearing the data of the adapter when doing a new search
viewModel.clearDataEvents.observe(this,
Observer {
viewModel.clearDataSource()
submitItems()
adapter.notifyDataSetChanged()
}
)
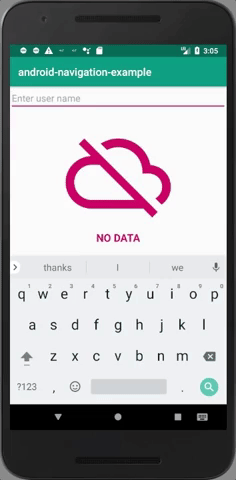
// Showing an empty view on the screen
viewModel.emptyVisibilityEvents.observe(this,
Observer { show ->
if(show != null) {
var visibility = if (show.peek()) View.VISIBLE else View.GONE
this.empty_view_imageView.visibility = visibility
}
}
)
// Display the recyclerview loading item
viewModel.recyclerViewLoadingEvents.observe(this,
Observer { show ->
if(show != null) {
adapter.loading = show.peek()
}
})})
Step 8 - Functions to handle a new DataSource
If, like in our example, we will need to change the data source by retrieving data from another endpoint, we will need to create a new method in the ViewModel to order the DataSourceFactory to create a new DataSource.
ViewModel
fun newSearch(user : String) {
    // set a new value for the dataSource internal variable
    dataSourceFactory.user = user
    clearData()
}
clearData will post a new Event on the LiveData observable
fun clearData() {
        this.clearDataEvents.postValue(Event(Unit))
    }
And our Activity will handle it
// Clearing the data of the adapter when doing a new search
        viewModel.clearDataEvents.observe(this,
                Observer {
                    viewModel.clearDataSource()
                    submitItems()
                    adapter.notifyDataSetChanged()
                }
        )
Step 9 - ???
Step 10 - Profit!
Try expanding on this project, by calling other APIs or implementing Dagger 2

 客服电话
客服电话
 APP下载
APP下载

 官方微信
官方微信


请发表评论